Table of Contents
The Scaffold Project
Sparrow 1.3 brought a new scaffold project, containing a lot of built-in functionality. Things that were previously difficult to achieve are now very easy. This how-to will teach you all you need to know to get started.
Overview
Start me up!
Before we begin to modify the project, I recommend having a look at what it's capable of per default. Open it up in Xcode and start it in the simulator or on your device. It's configured as a universal app, i.e. it runs on iPhone, iPod Touch and iPad in full resolution.
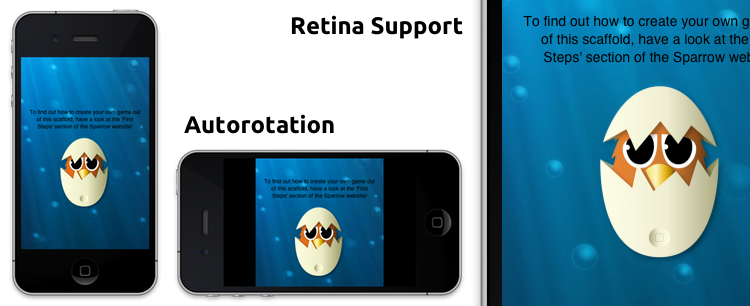
When the app is started, rotate your device and see what happens: the app is rotating in all directions!
Furthermore, it uses optimized graphics for both iPhone versions (Retina and non-Retina) and the iPad. It doesn't contain HD textures for new iPads (3rd generation), but it would be easy to add those, too.
There's another feature that you can't see right now: a transparent UIKit overlay that makes it easy to integrate iAds, the GameCenter, etc. We'll have a look at that later.
Project contents

As you can see on the right, the project contains quite a few classes. But don't worry: you won't have to touch most of those. The Game-class is where your game logic starts. If you are satisfied with the defaults, you won't have to touch anything else.
Nevertheless, here's a rough overview of the other classes:
- The Support-folder contains helper classes:
SPOverlayViewsits in front of your Sparrow view and will pick up other UIKit content, if you need that.- The
SPResizeEventis dispatched when the stage size changes, that is: if the device is rotated.
- The Game folder contains Sparrow-based content:
- The
GameControlleris the stage-subclass in this project, and is responsible for rotating your game, - which has its root object in the
Gameclass. - The
Mediaclass is a helper class that manages all your textures and sounds at a single place.
- The
AppDelegateis the standard startup-class of iOS projects. Sparrow's rendering targetSPViewis created here. - The
ViewControllerrepresents the link between Sparrow and UIKit. It controls the overlay view described above, and is the place you have to modify when you want to add support for GameCenter, iAds, etc.
While the Scaffold project does not use ARC by default, it is easy to convert it to an ARC project with the help of Xcode's refactoring tool. Find it under “Edit — Refactor — Convert to Objective-C ARC”. Beware that Sparrow itself should not be converted to ARC; it's enough to convert your project.
Choosing a target device family
An iOS app can be optimized either for iPhone/iPod Touch, for the iPad, or for both (“universal application”). This choice has several implications:
- An app targeting the iPhone is always created in a resolution of 320×480 points (not pixels!).
- An app targeting the iPad is always created in a resolution of 768×1024 points (not pixels!).
- A universal app has to support both of those resolutions.
Which target device family you want to choose depends on the project. Some games only make sense on the big screen of the iPad, others will work fine on both. Make your choice as soon as possible, because it will affect the complete development process.
My recommendation is to create a universal app whenever possible. You'll reach all iOS customers that way. Yes, it's more work than the other options; but thanks to Sparrow, the additional effort is minimal.
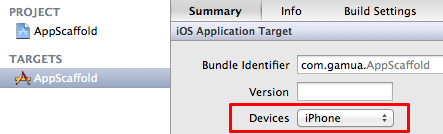
To change the target device family, enter the target summary view of Xcode and make your choice in the “Devices” dropdown menu.
iPhone / iPod Touch
There's nothing special you have to do with this setup!
- The stage size of your game will be 320×480
- Retina displays are supported by adding graphics with the
@2xsuffix.
iPad
This requires a few minor code changes, but in the end it will work like this:
- The stage size of your game will be 768×1024
- Retina displays are supported by adding graphics with the
@2xsuffix.
To prepare the project, make the following changes in the file “AppDelegate.m”:
// EXCHANGE the following line:
[SPStage setSupportHighResolutions:YES doubleOnPad:YES];
// with this:
[SPStage setSupportHighResolutions:YES];

// DELETE the following lines:
BOOL isPad = UI_USER_INTERFACE_IDIOM() == UIUserInterfaceIdiomPad;
int width  = isPad ? 384 : 320;
int height = isPad ? 512 : 480;

// EXCHANGE the following line:
GameController *gameController = [[GameController alloc] initWithWidth:width height:height];

[gameController release];
// with this:
GameController *gameController = [[GameController alloc] init];

[gameController release];
Universal
This configuration requires nothing special to set up.
But how does it work? The iPhone and the iPad have quite different screen sizes, after all. Here is a wiki-article describing the details: Universal App Development
To summarize:
- You have to align your objects within two different stage sizes:
- 320×480 for iPhone devices
- 384×512 for iPad devices
- You have to include different sets of textures for each device type:
- iPhone, non-retina:
image.png - iPhone, retina:
image@2x.png - iPad, non-retina:
image@2x.png - iPad, retina:
image@4x.png
Handling Device Rotation
The iPhone automatically rotates the user interface depending to the physical state of the device — that was one of the most revolutionary features of the iPhone when it was first released. Here is how to do that in Sparrow-based games.
Before you jump in, keep in mind that rotating the game does not make sense in all cases. Depending on the game, it might be a lot of work to move all objects to different positions when the orientation changes. I recommend, however, to support at least both portrait or both landscape orientations. That's very easy to do.
Portrait-only
To create an app that supports both portrait orientations (with the home-button at the top or bottom), choose those orientations in the target summary tab in Xcode.
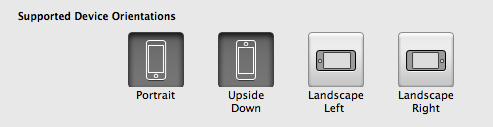
That's it! Your app will now automatically rotate to those orientations.
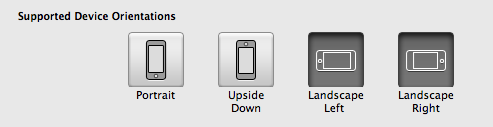
Landscape-only
To create an app that supports both landscape orientations (with the home button at the left or right side), choose those orientations in the target summary tab in Xcode.
Then open the file “App-Info.plist” and add the following entry:

That's it! Your app will now automatically rotate to those orientations.
All orientations
Per default, the Scaffold supports all orientations:
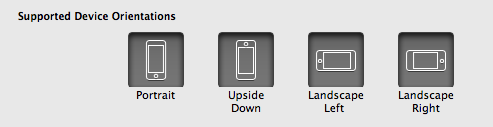
This makes the app rotate in all directions, but of course Sparrow can't decide for itself how your objects should be distributed in which orientation. Those changes have to be done manually.
This is what the SPResizeEvent is for. It is automatically dispatched on all your display objects, and it contains the width and height of the stage after the rotation. Listen for that event like this:
[self addEventListener:@selector(onResize:) atObject:self forType:SP_EVENT_TYPE_RESIZE];

- (void)onResize:(SPResizeEvent *)event
{
    NSLog(@"new size: %.0fx%.0f (%@)", event.width, event.height,
          event.isPortrait ? @"portrait" : @"landscape");
}
The Game class in the scaffold already contains this method stub. Make your interface updates in this method!
Adding UIKit elements
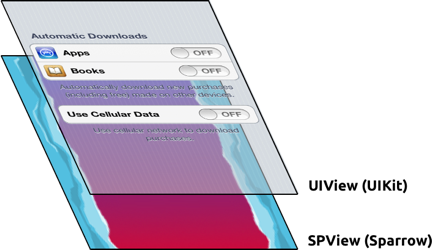
Sometimes, you want to add standard UIKit elements to your game. This is e.g. necessary when you want to display an input textfield or when you want to include Apple's iAds or GameCenter.
For that reason, the scaffold project creates an additional UIView object directly above Sparrow's SPView. Just like your Sparrow content, that view is automatically rotated according to the device orientation and your app settings. It is thus the perfect place to put any UIKit content.
You can access this layer from the ViewController class that is part of the scaffold. It's recommended to add all UIKit-related logic to that class, like this:
- When your
Gameneeds to display a UIKit element, let it dispatch a bubbling event with a custom type (string). - Make the
ViewControllerclass listen to those events at the Sparrow stage (it can access the stage). - In the corresponding event listeners, add the appropriate UIKit elements to the overlay view.
- If the Sparrow content needs to be informed about the results, it can call a method on the stage.
The following tutorial shows you how this is done in detail: Adding UIKit elements on top of Sparrow
Final words
These are the most important tasks you can achieve with the help of the Scaffold project. The rest of the fun lies within the Game class, where you'll create the actual game. Good luck!
Next section: Extending Sparrow